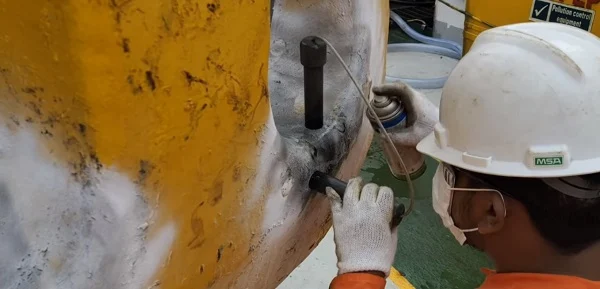
The following 8 non-destructive testing techniques and some of these techniques can be executed by utilizing a computer to speed up data acquisition and processing and can be used for testing materials up to 100% during processing.
These 8 non-destructive testing techniques include testing techniques with:
- Liquid Penetrants
- Magnetic Particles
- Swirling Current
- Ultrasonic
- Radiography
- Electromagnetic sorting
- Holograms
- Acoustic Emission
Testing with liquid penetrant aims to reveal defects on the surface of the material. Penetrant (seeping substance) is given by spraying or by impregnation onto a material surface that is clean and dry.
After removing the excess penetrant on the surface, the penetrant trapped in the defects will stretch out and be exposed by the absorbent developer.
Some of the permeating agents used are fluorescent which will show defects very clearly in ultra violet light.
The advantage of this liquid penetrant testing technique is that this process can be applied to all materials.
2. Magnetic Particles
Tests with magnetic particles are limited to materials made of ferromagnets. When the material is magnetized, the cracks lie more or less perpendicular to the plane of the magnetic field and become visible when fine ferromagnetic particles are sprinkled onto their surface.
3. Swirling Current
The test with eddy current can be carried out on any conductive material. A probe supplied with high frequency current will create an electric field in the component.
This electric field will change with the presence of defects on the surface or near the surface. These changes are visible in the equipment.
This technique is of the no-touch type and is suitable for spot checks, measurements of surface layer thicknesses and changes in metallurgical conditions.
4. Ultrasonic
Ultrasonic testing is based on the observation that an ultrasonic energy (high frequency acoustic energy) beam (type 1 – 25 MHz) will pass through a solid structure with little loss, but some will be reflected from internal surfaces, due to cracks and porosity. will appear on a VDT.
Shifting the transducer or specimen in an x-y pattern will produce a mapping and the time delay of the reflected waves will indicate a measure of depth.
Good coupling between the transducer and the workpiece is ensured by using a coupling fluid. This technique is the most important method for matrix-polymer composites.
5. Radiography
Testing with radiography using x-rays, gamma rays or neutrons, can reveal internal defects and surface cracks, which will reduce the absorption of penetrating radiation and appear as darker areas.
In addition, the absorption of x-rays and gamma rays increases with increasing atomic number and density, resulting in visible internal structures (such as in semiconductor devices).
Neutron is absorbed by several elements of light, including Hydrogen, so this technique is also suitable for testing plastic materials.
In conventional radiography, a 2D image is made on a film and the location of defects or features in the depth of the body cannot be identified. To overcome this weakness by using Computed Tomography (CT) which was originally created for medical purposes.
Fan-shaped x-ray light is passed through the component and its absorption is measured in a linear array by the photodetector. Measurements are repeated while the component is rotated and moved in translation.
A computer algorithm will create a 3-dimensional (3-D) image of the component with all the details in it.
The spatial resolution is better at 50 micrometers and the dimensional accuracy is better at 10 micrometers making this test technique suitable for reverse engineering components with complex shapes and internal holes. The output can be directly converted into a solid model.
6. Electromagnetic Sorting
Electromagnetic sorting is used to separate ferromagnetic components based on their hardness, composition or changes in composition in the surface layer (as occurs in the case of hardening). Sorting is based on the effect of these variables on the magnetic properties.
7. Holograms
The hologram forms a 3-D image of the components. The type of hologram used is an optical hologram showing surface defects while the type of acoustic hologram that uses ultrasonic waves has the potential to cause internal damage to the material.
8. Acoustic Emission
Acoustic emissions are of great value for process monitoring and machining. Internal processes such as fracturing and plastic deformation of blocks and surface processes such as shear and sliding all generate elastic energy which can be detected by a transducer attached to the surface.
That's a glimpse of 8 NDT techniques where the interpretation of NDT readings requires skill and careful judgment. Personal bias can be minimized if computer graphics are available to display and interpret the signals.
By using any of these 8 non-destructive testing techniques it is possible to obtain a complete map of the imperfections present in an important material.
©seputarpabrik.com

